Shaker Wainscoting Calculator
Measure from the floor, not the baseboard.
Target. Adjusted to fit the wall evenly.
Floor to the top of the chair rail.
Leave blank to match the batten width.
Battens carry up to a rail at the ceiling.
A mitered frame inside each opening.
Leave it on — the bottom rail is one batten wide and sits on top of the baseboard.
Take it off — the height above sets the bottom rail instead.
Put it back over — the bottom rail runs low and the baseboard goes back on over it, leaving one batten width showing.
144″ × 96″
Every piece on the drawing, every piece on the list.
What the plan actually contains
Three sheets, redrawn from the measurements above as you type. What they show is what the designer opens with.
144″ × 96″
| # | Shape | Piece | Long pt | End cuts |
|---|---|---|---|---|
| 1 | frame rail · 2 1/4″ wide | 144″ | SQ / SQ | |
| 2 | frame chair rail | 144″ | SQ / SQ | |
| 3 | vertical | 29 3/4″ | SQ / SQ | |
| 4 | vertical | 29 3/4″ | SQ / SQ | |
| 5 | vertical | 29 3/4″ | SQ / SQ | |
| 6 | vertical | 29 3/4″ | SQ / SQ | |
| 7 | vertical | 29 3/4″ | SQ / SQ |
Every batten the same length — set the stop once and cut the run.
144″ × 96″
- 1. CHECK THE WALL.
- 2. GATHER MATERIAL.
- 3. READ THE NUMBERS.
- 4. CUT AND LABEL.
- 5. LAY OUT THE WALL BEFORE YOU INSTALL.
- 6. INSTALL IN NUMBER ORDER.
- 7. FASTEN.
- 8. IF A PIECE RUNS LONG.
- 9. FINISH.
Start at #1 and count up — the rails first, dead level, then every batten off them.
Get my shaker wainscoting plan → More controls, doors and windows, backer sheets, and the finished PDF — free for shaker wainscoting.
Want it installed?
- Expert Crown Moulding builds accent walls
- Twenty years of trim carpentry
- Free estimate
See your wall in another style
Every one of these is drawn for your wall the same way. Your width and height come along.
Design free. Pay for the plan.
- Board & Batten
- Shaker Feature Wall
- Panel Moulding
- Picture-Frame Wainscoting
- Shaker Wainscoting
- The eleven geometric patterns
- Scaled elevation, every board numbered
- Full cut list, long point, to the sixteenth
- Numbered install order with build steps
- Print-ready PDF, no watermark
Design free in every style. You only pay when you want the plan printed.
Real walls, built from these plans
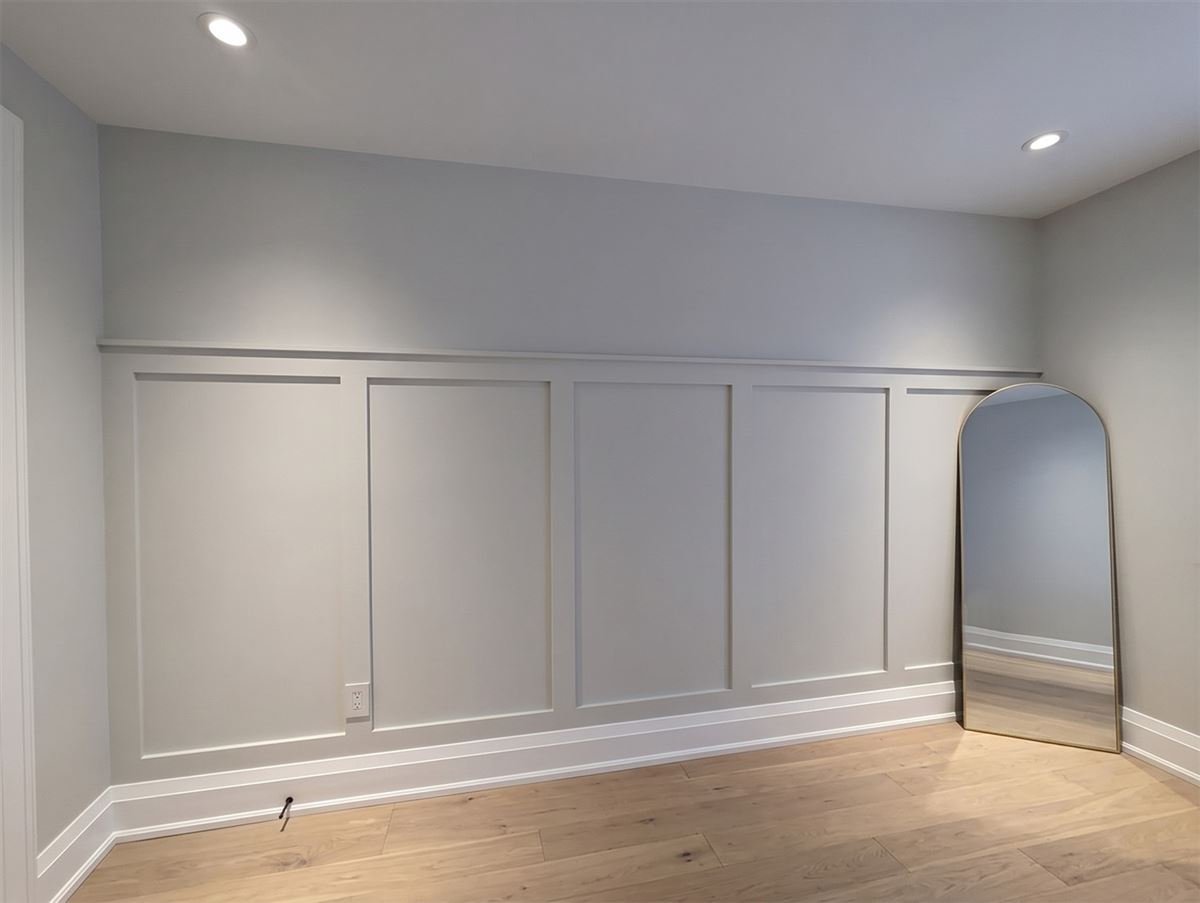
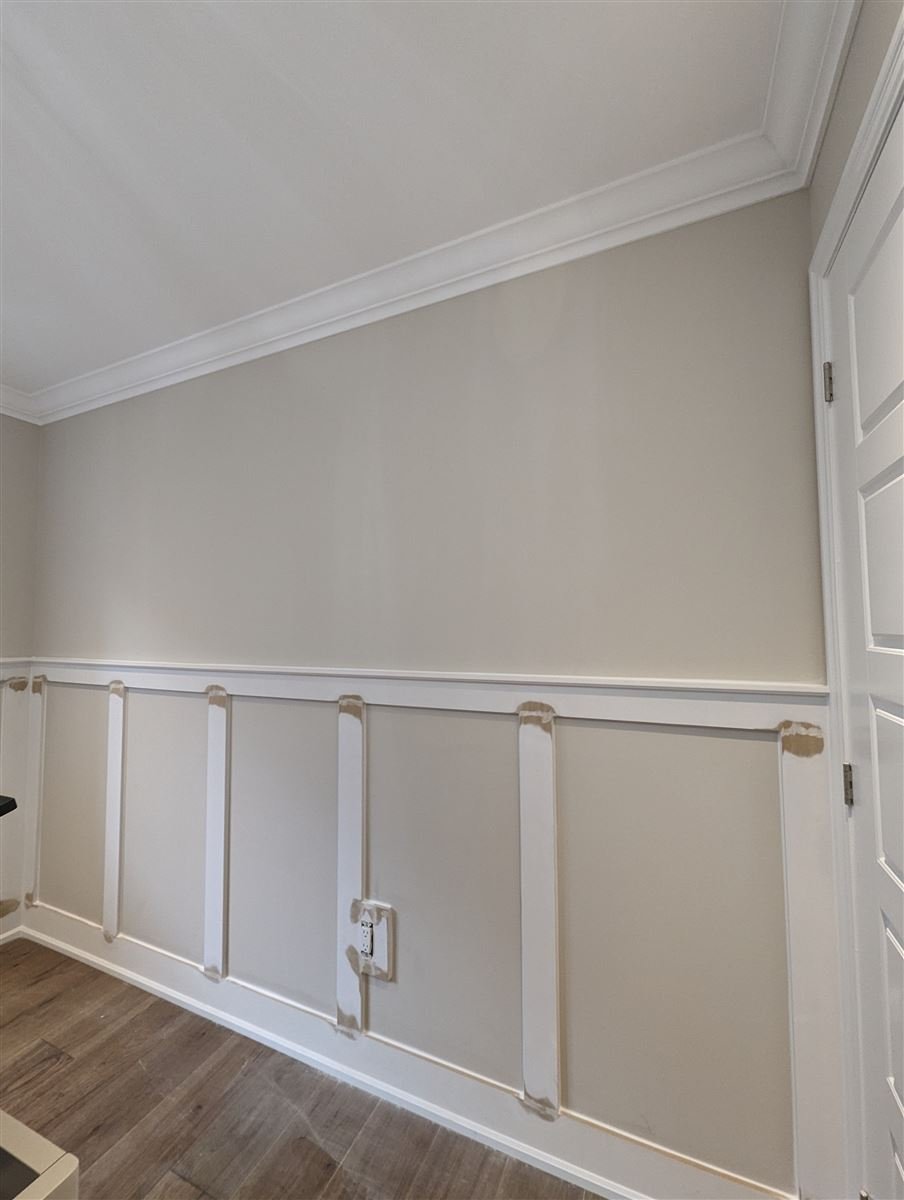
What shaker wainscoting actually is
Battens and rails
Flat vertical strips applied over finished drywall at even spacing, running from a bottom rail up to a chair rail, painted the same colour as the wall behind so the wall reads through the gaps. No frame, no groove, no panel. The whole assembly is baseboard, bottom rail, battens, chair rail — the battens land on wood at both ends.
It is the cheapest of the wainscoting families to build and the fastest, because every cut is square and every batten is the same length. The picture-frame version has four mitered pieces per box; this one has one piece per batten, and you set the stop on the saw once.
The height stack
The number you type is the height of the top of the chair rail — the line you snap on the wall. Everything below it comes off that:
ceiling
      ← optional battens above the rail,
        to a top rail
wainscot height
      ← the number you type:
        TOP OF THE CHAIR RAIL
  chair rail
  battens
  bottom rail
baseboard
floor
Type 36 and the rail lands at 36 inches off the finished floor. The rail width comes off that, and the battens run from the underside of the chair rail down to the top of the bottom rail. Batten length is an output.
This is the opposite of how most layout guides work — they describe the panel and let the rail land where it lands. On site you mark a height first and build to it, so the tool takes the number you are actually going to mark.
Type a height with no room for a workable batten and it gets raised to the nearest height that works, rather than handing you an empty wall.
The chair rail width follows the batten
Leave the rail width blank and it tracks the batten width — a 3-1/2″ batten gets a 3-1/2″ rail. That is the right default, because a rail narrower than the battens under it looks starved and a much wider one turns the wall into a shelf. Type a number if you want something else and the number sticks.
Stock
Primed MDF or 1x pine, ripped or off the rack. MDF is flatter and takes paint without grain, which matters when the whole wall is one colour. PVC in a bathroom.
Battens run 2-1/2″ to 3-1/2″ typically — a 1x3 is a true 2-1/2″ and a 1x4 is a true 3-1/2″. Lay out off the actual width, never the label. Half an inch of error per batten across eight battens is four inches gone, and the last opening eats all of it.
Use one material for the whole wall. Primed MDF trim sold as 1x4 measures 0.669″ thick and pine 1x4 is a true 3/4″; mix them and every place they meet has a step in it that caulk will not hide.
Wall prep
Battens are long and rigid, and this is where a bowed wall shows. Check the run with a straightedge before you buy. On a flat wall you glue and pin straight to the drywall. On knockdown or heavy texture, skim and sand, or sheet the field first — but sheeting builds the wall out and everything it meets has to reconcile.
Order of operations
Rails first, dead level: the bottom rail on the base (or the floor line), then the chair rail on its marked line — marked at both ends and checked with a level rather than measured off the floor. Then the battens, cut to fit between the two rails.
The end battens land flush with the ends of the wall, which is what makes the layout read as intentional rather than as something that ran out of room. Every batten between them is the same length as every other, so one stop setting on the saw covers the whole wall.
Every cut is square. There are no miters on this wall except the returns on the rail.
Baseboard
The bottom rail lands on top of the existing baseboard, so the base has to have a flat top for it to sit on. Bullnose or ogee gives the rail nothing to land on and it rocks. Replace it with square-top stock, or accept that the rail needs scribing.
Either way the baseboard height goes into the arithmetic — it sets where the rail sits and the battens start. Measure it rather than guessing. If the base is being replaced, decide the new height before anything gets cut. Taking the base off entirely is its own choice on this page: the bottom rail then runs at the floor and you set its width yourself.
Above the rail
Turn the upper zone on and the battens carry from the top of the rail up to a top rail at the ceiling, on the same plumb lines as the ones below.
That alignment is not optional and it is the rule that makes or breaks the look. A batten above the rail that sits half an inch off the one below reads as a mistake from across the room, and the eye finds it immediately even though the two are separated by a rail. Same solve, same positions, top and bottom.
The upper battens butt the rail below and the top rail above. Battens die on wood, not on drywall — that is what the top rail is for.
Outlets, doors and windows
Plan the layout so devices land in the open field between battens rather than on one. Where a receptacle falls on a batten you have to notch it, and a notched batten in an even run is the first thing anybody sees.
The rail should sit below the switch plates so it never crosses one. Adding 1/2″ or 3/4″ of stock in front of an electrical box leaves the device recessed, so fit a listed box extender at every device inside the panelled field — the box or extender has to reach the finished surface when that surface is combustible.
Where the rail dies into a door casing, cut a mitred return and glue it. Inside corners on the rail get coped, not mitred; a mitre opens the first heating season.
Fastening, caulk and paint
Grab adhesive down the back of the batten, pressed hard, with 18-gauge brads to hold it while it cures — three or four across the length, angled. Check for wire and pipe before firing into a bay. The rail wants a 15- or 16-gauge nail into framing.
Caulk every joint: batten to wall, batten to rail, rail to wall. This is most of the finish and most of the time. Seal every cut MDF end before topcoat or the core drinks primer and fuzzes into a grey halo along the cut.
The formula
The battens at both ends are part of the arithmetic. Eight battens across a wall leave seven openings between them, and the wall gives up eight batten widths before anything divides.
Opening = (wall width − (battens × batten width)) ÷ (battens − 1)
Batten length is what is left between the underside of the chair rail and the top of the bottom rail.
You give it a target opening and it solves the count — the spacing comes back snapped exact, so a whole number of battens fills the wall with no end sliver.
Wainscot height
Floor to the top of the rail, baseboard included.
| Ceiling | Wainscot height |
|---|---|
| 7 ft (84″) | 28″ |
| 8 ft (96″) | 32″–36″ |
| 9 ft (108″) | 36″–42″ |
| 10 ft (120″) | 40″–48″ |
Thirty-six is the number everyone repeats and it is on the high side. The working range is 26″ to 32″ and too low beats too high. If the room has a run of windows, matching the rail to the sill beats any table.
Spacing
| Range | Notes | |
|---|---|---|
| Batten width | 2-1/2″–3-1/2″ | 1x3 and 1x4 in actual dimensions |
| Opening between battens | 12″–18″ | Under 10″ reads busy, over 20″ reads sparse |
| Chair rail | Blank tracks the batten width |
Opening width is the whole look. Tight spacing at 12″ reads modern and busy; 16″ to 18″ is the traditional half-wall look. Whatever you pick, every opening on the wall is the same, which is the point of solving the count instead of guessing it.
Solving a real wall
Twelve-foot wall, 8-foot ceiling. Rail at 36″, batten 3-1/2″, rail width tracking the batten at 3-1/2″, baseboard 5-1/2″ kept on the wall.
The chair rail's underside is 36 − 3-1/2 = 32-1/2. The bottom rail — one batten width, sitting on the base — tops out at 5-1/2 + 3-1/2 = 9. Batten length 23-1/2″.
| Battens | Opening |
|---|---|
| 6 | 24-19/32″ |
| 7 | 19-29/32″ |
| 8 | 16-9/16″ |
| 9 | 14-1/16″ |
Eight battens at 16-9/16″ is the call on this wall — traditional spacing, seven equal openings, nothing crowded. Nine at 14-1/16″ reads tighter and more modern. Neither leaves an odd gap at the corner, because the end battens are flush and the count is solved against the wall.
The cut list
Eight battens, 12-foot wall, rail at 36″:
- 1 bottom rail at 144″ — one batten width, the battens land on it
- 1 chair rail at 144″
- 8 battens at 23-1/2″ — all identical, one stop setting
About 40 linear feet before waste, and every cut square.
Turn on the zone above the rail and it adds eight more battens running rail to ceiling, on the same eight plumb lines, plus a top rail — on this wall that is eight at 56-1/2″ and another 144″ rail, and the wall becomes a full-height board and batten with a chair rail through it.
What to buy
The plan gives linear feet with a waste allowance, because that number holds whatever length your supplier stocks. Turning it into boards is the part nobody does for you.
Four of the 23-1/2″ battens come off an 8-foot board, so eight battens is two boards. The two 144″ rails each need stock longer than twelve feet — a nominal 12-footer measures 144″ with nothing to trim and the ends are rarely square enough to trust, so buy 14 or 16 foot and cut each from one length.
Two 8-footers, two long rails, one spare. Running the upper zone as well, add stock for eight battens at 56-1/2″ — four 12-footers cut two each — and a third long rail.
Common mistakes
Laying out off nominal dimensions. A 1x4 is 3-1/2″ wide, not 4″. Eight battens off the label is four inches of error and the openings absorb all of it.
Guessing the batten count. You pick six because six looked right in a photo, and the openings come out at nearly 25″ — a wall of gaps with some sticks on it.
Setting the rail off the baseboard instead of a level line. Floors move, baseboards get scribed to them, and the rail wanders an eighth at a time down the wall.
Battens above the rail that miss the ones below. Half an inch of offset across a horizontal band reads as a mistake from the doorway. Same plumb lines, top and bottom, or leave the upper zone off.
Landing the bottom rail on a bullnose baseboard. The rounded top gives it nothing to sit on, so the rail rocks, every batten on it rocks with it, and the caulk line cracks the first winter.
Mitring the inside corner on the rail. It opens. Cope it.
Skipping the caulk. Caulk is what turns a row of separate sticks into one built surface, and the gap between a professional wall and an obviously DIY one is almost entirely that line.
Common questions
What is shaker wainscoting?
Flat vertical battens applied over drywall at even spacing, running from a bottom rail up to a chair rail, painted with the wall. It is board and batten stopped partway up the wall rather than run to the ceiling. Some people call it half-wall board and batten, and it is the same thing.
How do I work out the batten spacing?
Opening equals wall width, minus the batten count times the batten width, divided by one less than the count — because the end battens are flush and there is one fewer opening than there are battens. Or give the calculator a target opening and let it solve the count for you, which is the way round most people want it.
How far apart should the battens be?
Twelve to eighteen inches of open wall between them. Tighter than about 10″ starts to read busy, wider than about 20″ reads sparse. Sixteen inches is the traditional half-wall look and the one most people picture.
How high should it go?
Floor to the top of the rail, baseboard included. One third of the wall height is the starting point: 32″ to 36″ on an 8-foot ceiling, 36″ to 42″ on a 9-foot, 40″ to 48″ on a 10-foot. Thirty-six is repeated everywhere and is on the high side; 26″ to 32″ is the range that keeps coming back, and too low beats too high.
Why does the calculator ask for the rail height and not the batten length?
Because the rail height is the number you mark on the wall and snap a line at. The batten length is what falls out of it once the chair rail, the bottom rail and the baseboard are taken off, and you do not care what it is until it is time to cut.
How wide should the chair rail be?
Leave it blank and it matches the battens, which is the safe answer — a rail narrower than the battens looks starved, and a much wider one turns the wall into a shelf. Type a number if you want a specific profile.
Can the battens continue above the rail?
Yes. Turn the upper zone on and they run from the rail to a top rail at the ceiling, on the same plumb lines as the ones below. That alignment matters more than anything else on the wall — battens that miss across the rail read as a mistake from across the room.
Can I run this over the existing baseboard?
If it has a flat top for the bottom rail to sit on, yes — the rail lands on the base and the battens land on the rail. Bullnose or ogee gives the rail nothing to land on and it rocks. Replace it with square-top stock, and decide before you cut because the base height sets where the rail sits and the battens start.
How is this different from picture-frame wainscoting?
Battens instead of boxes. This one is vertical sticks with the wall showing between them; picture frame is mitered rectangles of panel moulding under the same kind of chair rail. This is faster and cheaper to build — every cut is square, where picture frame is four miters per box. Picture frame reads more traditional.
How is this different from board and batten?
Board and batten runs the battens the full height of the wall to a top rail at the ceiling. This stops at a chair rail partway up. Turn on the zone above the rail here and you have both — battens top to bottom with a rail running through, which is a look in its own right.