Shaker Wall Panel Calculator
Floor to ceiling, baseboard included.
Stiles, rails and mid rails are all one width.
Empty lets the calculator pick the count.
A mitered frame inside every box.
The strips land on a bottom rail, and the baseboard decides it: leave the base on and the rail is one strip width, sitting on top of it. Take it off and you set the rail's width here. Put it back over and the rail runs low with a one-strip reveal, the base reinstalled over it.
Needs an odd column count; the others split the rest.
Needs three rows; the top and bottom rows split the rest.
144″ × 96″
Every strip on the drawing, every strip on the list.
What the plan actually contains
Three sheets, redrawn from the measurements above as you type. What they show is what the designer opens with.
144″ × 96″
| # | Shape | Piece | Long pt | End cuts |
|---|---|---|---|---|
| 1 | bottom rail | 144″ | SQ / SQ | |
| 2 | top rail | 144″ | SQ / SQ | |
| 3 | stile | 89 3/4″ | SQ / SQ | |
| 4 | stile | 89 3/4″ | SQ / SQ | |
| 5 | stile | 89 3/4″ | SQ / SQ | |
| 6 | stile | 89 3/4″ | SQ / SQ | |
| 7 | mid rail | 42 21/32″ | SQ / SQ | |
| 8 | mid rail | 42 21/32″ | SQ / SQ |
… and 4 more pieces on the real sheet.
Set the stop once per length — cut all of one length in a run.
144″ × 96″
- 1. CHECK THE WALL.
- 2. GATHER MATERIAL.
- 3. READ THE NUMBERS.
- 4. CUT AND LABEL.
- 5. INSTALL IN NUMBER ORDER.
- 6. FASTEN.
- 7. IF A PIECE RUNS LONG.
- 8. FINISH.
Start at #1 and count up — the order is the plan.
Get my shaker wall plan → More controls, obstacles and openings, and the finished PDF — free for shaker.
Want it installed?
- Expert Crown Moulding builds accent walls
- Twenty years of trim carpentry
- Free estimate
See your wall in another style
Every one of these is drawn for your wall the same way. Your width and height come along.
Design free. Pay for the plan.
- Board & Batten
- Shaker Feature Wall
- Panel Moulding
- Picture-Frame Wainscoting
- Shaker Wainscoting
- The eleven geometric patterns
- Scaled elevation, every board numbered
- Full cut list, long point, to the sixteenth
- Numbered install order with build steps
- Print-ready PDF, no watermark
Design free in every style. You only pay when you want the plan printed.
Real walls, built from these plans
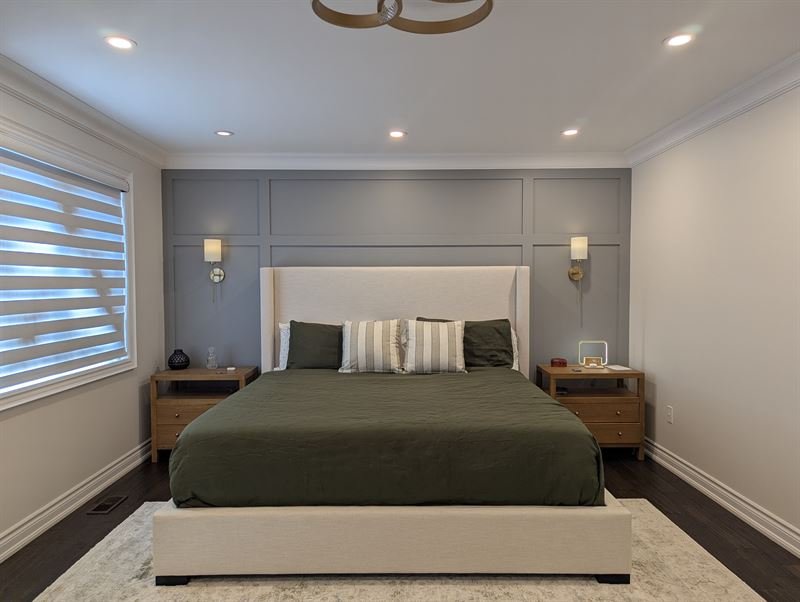
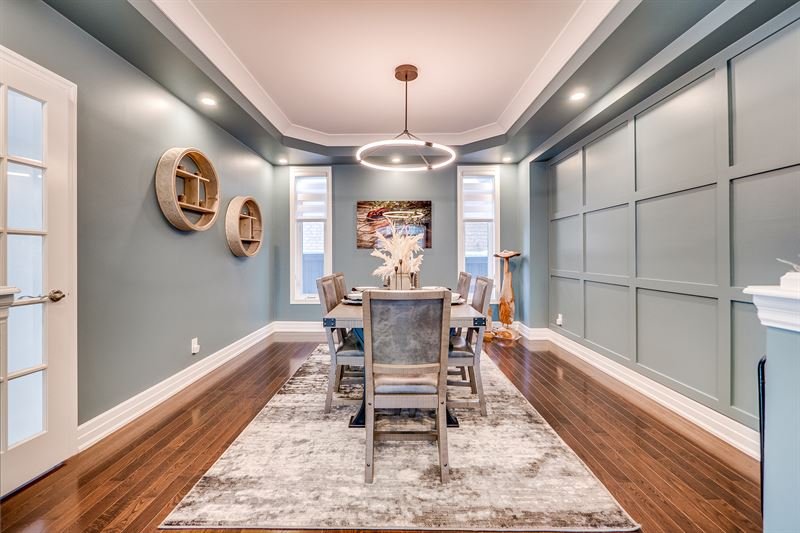
How to build it
If you want half-height panelling with a cap rail, that is wainscoting and it has its own calculator.
It is not joinery
There is no frame, no groove, no floating panel. It is flat strips glued to a flat wall in a grid, caulked at every joint, and painted the same colour as the wall behind — so the “panel” is just the wall showing through the hole in the grid. Once you see it that way the job is a layout problem and a painting problem, in that order, and neither one involves a router.
This is also why it is not the same as the PVC or laminate wall panels sold by the sheet. Those are a covering measured in square feet. This is trim measured in linear feet, and the arithmetic below will not help you count sheets.
The stack, bottom to top
Four parts. At the floor, a baseboard — the one already there, or a new one. A bottom rail running the full wall width, landing on the top of that base. Vertical stiles running from the bottom rail to the top rail. A top rail at the ceiling, full width, which is also the landing for crown if crown is going on.
Everything between those is the grid: intermediate verticals at every box line, and short horizontal pieces dropped in between them wherever a row breaks.
Stock
You are ripping strips from sheet or buying 1x trim off the rack. Primed MDF is the usual call — dead flat, takes paint without grain showing through, cheap, and the whole point of a shaker wall is that it reads as one painted surface. Poplar and pine work. PVC is the right answer in a bathroom or a laundry, because MDF that gets wet swells and never goes back.
Buy the entire wall in one material. Primed MDF trim sold as 1x4 measures 0.669″ thick, call it 11/16″. Pine 1x4 is a true 3/4″. Mix them and every joint has a step in it that caulk will not hide, and it shows up as a line every time light rakes across the wall.
Ripping your own from 1/2″ MDF sheet is the cheaper route and gives you any face width you want, but it caps every piece at 96″ — which matters, because a full-width rail on anything over 8 feet then has to be joined.
Wall prep
The strip is rigid and your wall is not. Check it with a long straightedge before you buy anything. On a smooth flat wall you glue and pin straight to it. On knockdown or orange peel, skim the wall flat and sand, or sheet the whole field in 1/4″ MDF and hide the seams behind strips — faster and flatter, but it builds the wall out and you have to reconcile that at the door casing and the corners before you cut.
A bow leaves daylight under the edge of every strip on the high spots. There is no fixing it after the glue cures except pulling the strips off, and grab adhesive takes drywall paper with it.
Order of operations
Bottom rail first, then the top rail, both cut to the full wall width. Then the two end stiles, cut to fit between them. Then the intermediate verticals at the same length. Short horizontals go in last, cut to box width and dropped between the verticals.
That order is what makes the job fast. Every vertical is the same length, so you set the stop on the mitre saw once. Every short horizontal is the same length, so you set the stop once more and cut twelve pieces instead of measuring twelve times. Change the order and you are back to measuring every opening individually and living with the accumulated error.
Every cut on the flat grid is a square cut. Nothing on a plain shaker wall is mitered. That changes if you add inset moulding — see below.
Windows and doors
Set a full vertical hard against each side of every door and window casing, then treat what is left as its own field. The grid does not run behind a door. Above a door you get a shorter band of boxes; around a window you get a band above the head and a band below the sill, and the boxes in those bands are their own row heights.
The casing has to stand proud of the strip. If it does not, back-band the casing or you get a visible step where the strip dies into the casing edge, and no amount of caulk reads as intentional.
Outlets and switches
Lay the grid out so devices land in the open field of a box, not on a strip. That is free if you plan it and expensive if you do not. Where one falls on a strip you have to notch the strip around it, and a notched strip in the middle of a grid is the first thing anybody sees.
Adding 1/2″ or 3/4″ of wood in front of an electrical box leaves the device recessed. Fit a listed box extender at every device inside the panelled field — the front edge of the box or the extender has to reach the finished surface when that surface is combustible. A longer screw and a hopeful cover plate is not the fix.
Baseboard
Two choices, and it changes the arithmetic, so decide before you cut. Run the grid on top of the existing base, which only works if the base has a flat top ledge for the bottom rail to land on — bullnose or ogee gives the strip nothing to sit on, the rail rocks, and the caulk line along the bottom cracks the first winter. Or pull the base and run new square-top stock, which costs an afternoon and gives you a flat landing plus exact control of where the grid starts.
Either way, the field height the grid divides into is measured from the top of the finished base to the ceiling, not from the floor.
Fastening
Grab adhesive is the fixing. Zig-zag bead down the back of the strip, press it hard to the wall. Pins hold the piece still while the glue cures, they are not holding it up — 18-gauge brads, three or four across an 8-foot strip, driven at alternating angles. Check for wire and pipe with a detector before you fire into a stud bay.
The rails and the top of the wall take more handling and want a 15- or 16-gauge finish nail into framing where the layout gives you one.
Fill, caulk, paint
Caulk every joint: strip to wall, strip to strip, strip to base. This is most of the finish. An uncaulked grid reads as a stack of separate boards stuck to a wall; a caulked one reads as one built surface, and the difference between a professional wall and an obviously DIY one is almost entirely that caulk line. Budget an evening for it on an average wall and do not rush the tooling.
Seal the cut ends. MDF edges are porous — they drink primer, swell and fuzz, and you get a rough grey halo along every cut that shows through three coats. Sand cut edges to 220, then a shellac-based primer, then finish. Two coats of eggshell or satin over the whole assembly, wall included.
Grid layout and spacing rules
The perimeter strips are part of the grid. This is the single rule that separates a layout that works from one that ends in a sliver. Six boxes across needs seven verticals — one at each end plus five between — and the wall has to give up seven strip widths before you divide anything. Miss that and the whole grid shifts off centre by half a strip width, so nothing lands where your pencil marks say.
Box width = (wall width − ((columns + 1) × strip width)) ÷ columns
Box height = (field height − ((rows + 1) × strip width)) ÷ rows
Field height is floor to ceiling if you pulled the base, or top of the finished base to the ceiling if the grid sits on it.
There is no gap number on a shaker wall. The strip width is the spacing — the members touch nothing but each other and the wall, and what you see between them is the box. That is the difference between this and board and batten, where the gap is its own dimension.
Strip stock — nominal against actual. You cannot lay out a wall off the label. Use the actual width.
| Stock | Actual thickness | Actual width |
|---|---|---|
| Pine / poplar 1x2 | 3/4″ | 1-1/2″ |
| Pine / poplar 1x3 | 3/4″ | 2-1/2″ |
| Pine / poplar 1x4 | 3/4″ | 3-1/2″ |
| Primed MDF trim “1x3” | 0.669″ (11/16″) | 2-1/2″ |
| Primed MDF trim “1x4” | 0.669″ (11/16″) | 3-1/2″ |
| Ripped from 1/2″ MDF sheet | 1/2″ | whatever you set the fence to |
1x3 at a true 2-1/2″ is the everyday shaker strip. 1x4 reads heavier and more traditional and eats a lot of wall on a short run. Under 2″ starts to look like trim rather than structure.
Thickness is a shadow-line decision. 1/2″ gives a clean modern reveal, 3/4″ gives a deeper shadow and a more traditional look. Thicker also means more stand-off to reconcile at the casing and more depth to make up at every outlet.
Box proportions.
| Look | Width to height |
|---|---|
| Portrait — the standard shaker grid | 2:3 to 3:4 |
| Square | 1:1 |
| Landscape — for a wide low wall | 3:2 to 4:3 |
Target box width lands between 12″ and 36″. A square grid is a named style and works, but every box on the wall has to be the same shape — a square row above a portrait row is what makes a grid look unresolved, and the eye catches it from the doorway even when it cannot say why.
Solving a real wall. A 12-foot wall, 8-foot ceiling, 1x4 strips at a true 3-1/2″, grid sitting on top of a 5-1/2″ baseboard. Wall width 144″. Field height 90-1/2″.
| Columns | Box width |
|---|---|
| 4 | 31-5/8″ |
| 5 | 24-5/8″ |
| 6 | 19-15/16″ |
| 7 | 16-9/16″ |
| 8 | 14-1/16″ |
| Rows | Box height |
|---|---|
| 1 | 83-1/2″ |
| 2 | 40″ |
| 3 | 25-1/2″ |
Six columns and three rows gives boxes of 19-15/16″ by 25-1/2″ — about 3:4, portrait, inside the band, eighteen identical boxes. Five columns and three rows gives 24-5/8″ by 25-1/2″, near enough square and a calmer wall. Both are correct. Neither leaves a sliver, because the arithmetic never asks the last box to absorb the remainder.
Three rows is the ceiling on a full-height wall, and on a tall room that decides your column count for you. Take the same 12-foot wall with a 10-foot ceiling: the field is 114-1/2″ and three rows gives boxes 33-1/2″ tall. Six columns against that is 19-15/16″ by 33-1/2″, too narrow for its height and it reads as a ladder. Drop to five columns and you are at 24-5/8″ by 33-1/2″ — about 3:4 again, back inside the band. On a tall wall, fewer and wider boxes.
The cut list that falls out of it. Six columns, three rows, 3-1/2″ strips, 144″ wide, 90-1/2″ field:
- 2 rails at 144″ — top and bottom, full wall width
- 7 verticals at 83-1/2″ — field height less the two rails
- 12 short horizontals at 19-15/16″ — two row lines, six boxes wide
Just over 92 feet of strip before waste. Every piece square-cut.
What to buy. The plan gives you linear feet with a waste allowance, because that is the number that holds no matter what length your supplier stocks. Turning it into a pile of boards is the part nobody does for you, so here it is worked through.
The verticals and the shorts come off 8-foot stock. The rails do not.
Seven 8-footers give you the seven verticals, one per board with 12-1/2″ left over. Three more 8-footers give you the twelve shorts, four per board. That is ten boards.
The two 144″ rails need a board longer than 12 feet — a nominal 12-footer measures 144″ with nothing to trim, and the ends are rarely square enough to trust. Buy 14- or 16-foot stock and cut each rail from one length. If you are ripping from sheet you cannot get 144″ at all, so scarf the rail: square butt joint, landed where a vertical crosses, so the vertical covers the seam.
Ten 8-footers, two long boards, and buy one extra 8-footer. You will need it.
Inset moulding — the framed version
This is the option that separates a shaker wall from a shaker wall somebody paid for. Instead of leaving each box as bare painted drywall, a small mitered picture frame is fitted flush inside the opening — four sticks per box, tight to the strips on all four sides, no reveal.
The look is a deeper, more traditional wall. Light catches the moulding profile inside each box and the grid stops reading as flat boards and starts reading as panelling. Turn it on in the calculator and the sticks come through on the same cut list, listed separately.
Know what it costs before you commit. On the six-by-three wall above, inset adds seventy-two pieces to a job that had twenty-one, and every one of them is mitered at 45° on both ends — so a wall that was entirely square cuts becomes a wall with 144 miters in it. Material goes from about 92 feet to about 228 feet. That is roughly twenty-one more 8-foot lengths of moulding on top of the boards for the grid, and buy spares — a miter that closes on one end and gaps on the other is a piece you cut again, and the standard waste allowance was not written for a wall with 144 miters in it.
Moulding size. 1-5/8″ is the default and the safe call — panel moulding, base cap and small ogee all live around there. Wider than that and the frame starts to crowd a 20″ box. The width is its own control because it is a different profile from the flat strip: the strip is square stock, the inset is a moulding with a face on it.
Small boxes get no frame. There has to be room inside the opening for four sticks and the miters that join them. Below roughly 3-3/4″ in either direction with 1-5/8″ moulding, the calculator leaves that box bare rather than drawing a frame that could not be built. On a normal wall this never fires; on a short bottom row under a window it can, and it is better to see one honest bare box than a cut list with four pieces on it that will not go together.
Cut them long point to long point. Every stick is measured to the outside of the miter, which is the same as the box dimension. Cut to the short point and every frame in the room comes up an inch and a quarter shy.
Common mistakes
Picking the box size before the strip count. You decide on 20″ boxes, divide the wall, and the last box comes out 11″ — a sliver against the corner that every visitor’s eye finds first.
Leaving the end strips out of the arithmetic. Six boxes needs seven verticals. Count six and the whole grid sits half a strip width off centre and nothing lands on your marks.
Laying out off nominal dimensions. A 1x3 is 2-1/2″ wide, not 3″. Seven verticals off the label is seven half-inches of accumulated error, and the last box eats all of it.
Forcing too many rows on a tall wall. Three is the working maximum on a full-height grid. Trying to get a fourth row out of a 10-foot ceiling gives you boxes so short they read as a stack of letterbox slots, and the fix is fewer columns, not more rows.
Panelling a wall you have not checked. A bowed wall leaves a shadow gap under the edge of every strip on the high spots, and once the strips are glued there is no fix short of pulling them off and taking drywall paper with them.
Landing the bottom rail on a bullnose baseboard. The rounded top gives the strip nothing to sit on, so the rail floats out of plane or rocks, and the caulk line cracks the first heating season.
Skipping the caulk on strip-to-strip joints. Caulk is what turns a grid of separate boards into one surface. Without it every joint reads as a seam and the wall looks stuck on rather than built.
Painting cut MDF edges without sealing them. The exposed core drinks primer, swells and fuzzes, and you get a rough grey halo along every cut that three coats of eggshell will not bury.
Forgetting the box extenders. Wood in front of an electrical box leaves the device recessed behind a combustible surface, which fails inspection, and the cover plate rocks because the screws are pulling against nothing.
Common questions
How do I work out how many panels I need for my wall?
Count strips, not panels. Box width equals wall width minus (columns plus one) times strip width, all divided by columns. Try three or four column counts and take the one that puts your box width between 12″ and 36″. Total boxes is columns times rows. If you are trying to count sheets of PVC or laminate wall panelling, this is the wrong tool — that is a square-footage problem, this is a linear-footage one.
How do I measure a wall for panelling?
Width at the height the grid will sit, not at the floor — walls are rarely parallel. Ceiling height at both ends and in the middle, and use the shortest. Baseboard height, if the grid is landing on it. Then every window and door: the width of the casing outside edge to outside edge, how far it sits from the corner, and the height of the head and the sill off the floor. Those five numbers per opening are what let the layout route around it.
How many rows should a full-height wall have?
One, two or three. One tall row reads modern and is the easiest job on the list. Two is the common answer on an 8-foot ceiling with a low grid. Three is the usual full-height look and the practical maximum — past that the boxes get too short to read as boxes. On a 9- or 10-foot ceiling, hold at three rows and take columns out rather than adding a row, or the proportions go long.
What size strips should I use?
A true 2-1/2″ (1x3) is the everyday shaker strip and 3-1/2″ (1x4) reads heavier and more traditional. Wider strips eat wall: on a 12-foot wall, going from 2-1/2″ to 3-1/2″ costs about 7″ of total box width across six columns. Under 2″ starts to read as applied trim rather than a built grid.
What thickness?
1/2″ ripped from sheet gives a clean modern shadow line. 3/4″ gives a deeper shadow and a more traditional look. Thicker means more stand-off at the casing and more depth to make up at every outlet, so check both before you commit.
Do the boxes have to be square?
No. Portrait at 2:3 to 3:4 is the standard shaker look. Square at 1:1 is a named style and works well on a tall wall. Landscape at 3:2 to 4:3 suits a wide low wall. What matters is that every box on the wall is the same shape.
What is inset moulding and is it worth it?
It is a small mitered frame fitted flush inside each box, and it turns a flat grid into something that reads as real panelling. It is worth it if you want the traditional look and you are comfortable cutting miters. It is not a small addition: on an eighteen-box wall it adds seventy-two pieces and 144 miters, and roughly triples the trim you buy. Do a plain grid first if this is your first panelled wall.
What size moulding goes inside the box?
1-5/8″ is the default and suits most box sizes — panel moulding, base cap or a small ogee. Go much wider and the frame crowds a 20″ box. It is a different stock from the flat grid strips: those are square-edged boards, this is a profiled moulding.
What do I do about an outlet in the middle of a panel?
Lay the grid out so it lands in the open field of a box. That costs nothing at the planning stage. Where one falls on a strip you notch the strip, and it will show. Either way the box needs a listed extender to bring it flush with the new finished surface.
What about a window or a door in the wall?
Run a full vertical tight against each side of the casing on both sides, so the casing reads as part of the grid. Above a door you get a short band of boxes. Around a window you get a band above the head and a band below the sill, each with its own row height. The casing has to stand proud of the strip — if it does not, back-band it.
Can I panel over the existing baseboard?
Yes if it has a flat top ledge for the bottom rail to land on. If it is bullnose or ogee, replace it with square-top stock. Either way it raises where your grid starts, so measure the field height from the top of the finished base and decide before you cut anything.
Why is there a gap between my panelling and the wall?
The wall is not flat. Strips are rigid and bridge a hollow, leaving a shadow line visible from the doorway. Small gaps take a sandable filler or an acrylic frame sealant. Anything approaching 3/8″ needs beading to cover it, or the strips off and the wall skimmed. Check with a long straightedge before you buy.
Do I really have to caulk every joint?
Yes, and it is most of the finish. Strip to wall, strip to strip, strip to base, then sand and prime. The gap between a professional wall and an obviously DIY one is almost entirely the caulk line.
Is this a DIY job?
Yes, if the wall is flat and you have a mitre saw, a brad nailer and a level. On a plain grid every cut is square — there are no mitres at all — and the layout is the only hard part, which is what the calculator is for. Add inset moulding and it becomes a mitering job and a longer weekend. What takes the time either way is the caulking and the paint, not the carpentry.